Stacking presets in Aurora HDR Pro
As you have read here before, I am doing all my HDR work in Aurora HDR Pro now, and I absolutely love it. It's been a real breath of fresh air for my processing, saving me multiple steps in post and keeping me interested and motivated to learn and share more. So today I am back with something that is sort of a text version of a tutorial I put on YouTube the other day.
If you are interested in seeing the whole video on YouTube, just click below. Or if you want to review it here, read on.
This is a photo that I took in that loveliest of cities, Copenhagen, a couple of years ago. Like many photos, it has been sitting in my library just collecting virtual dust. I thought it would be great to run it through Aurora and see what I could come up with. It was evening time and blue hour was in full swing, and I was at Nyhavn, their historic harborfront entertainment area. It's quite beautiful, and a must-see spot in Copenhagen.
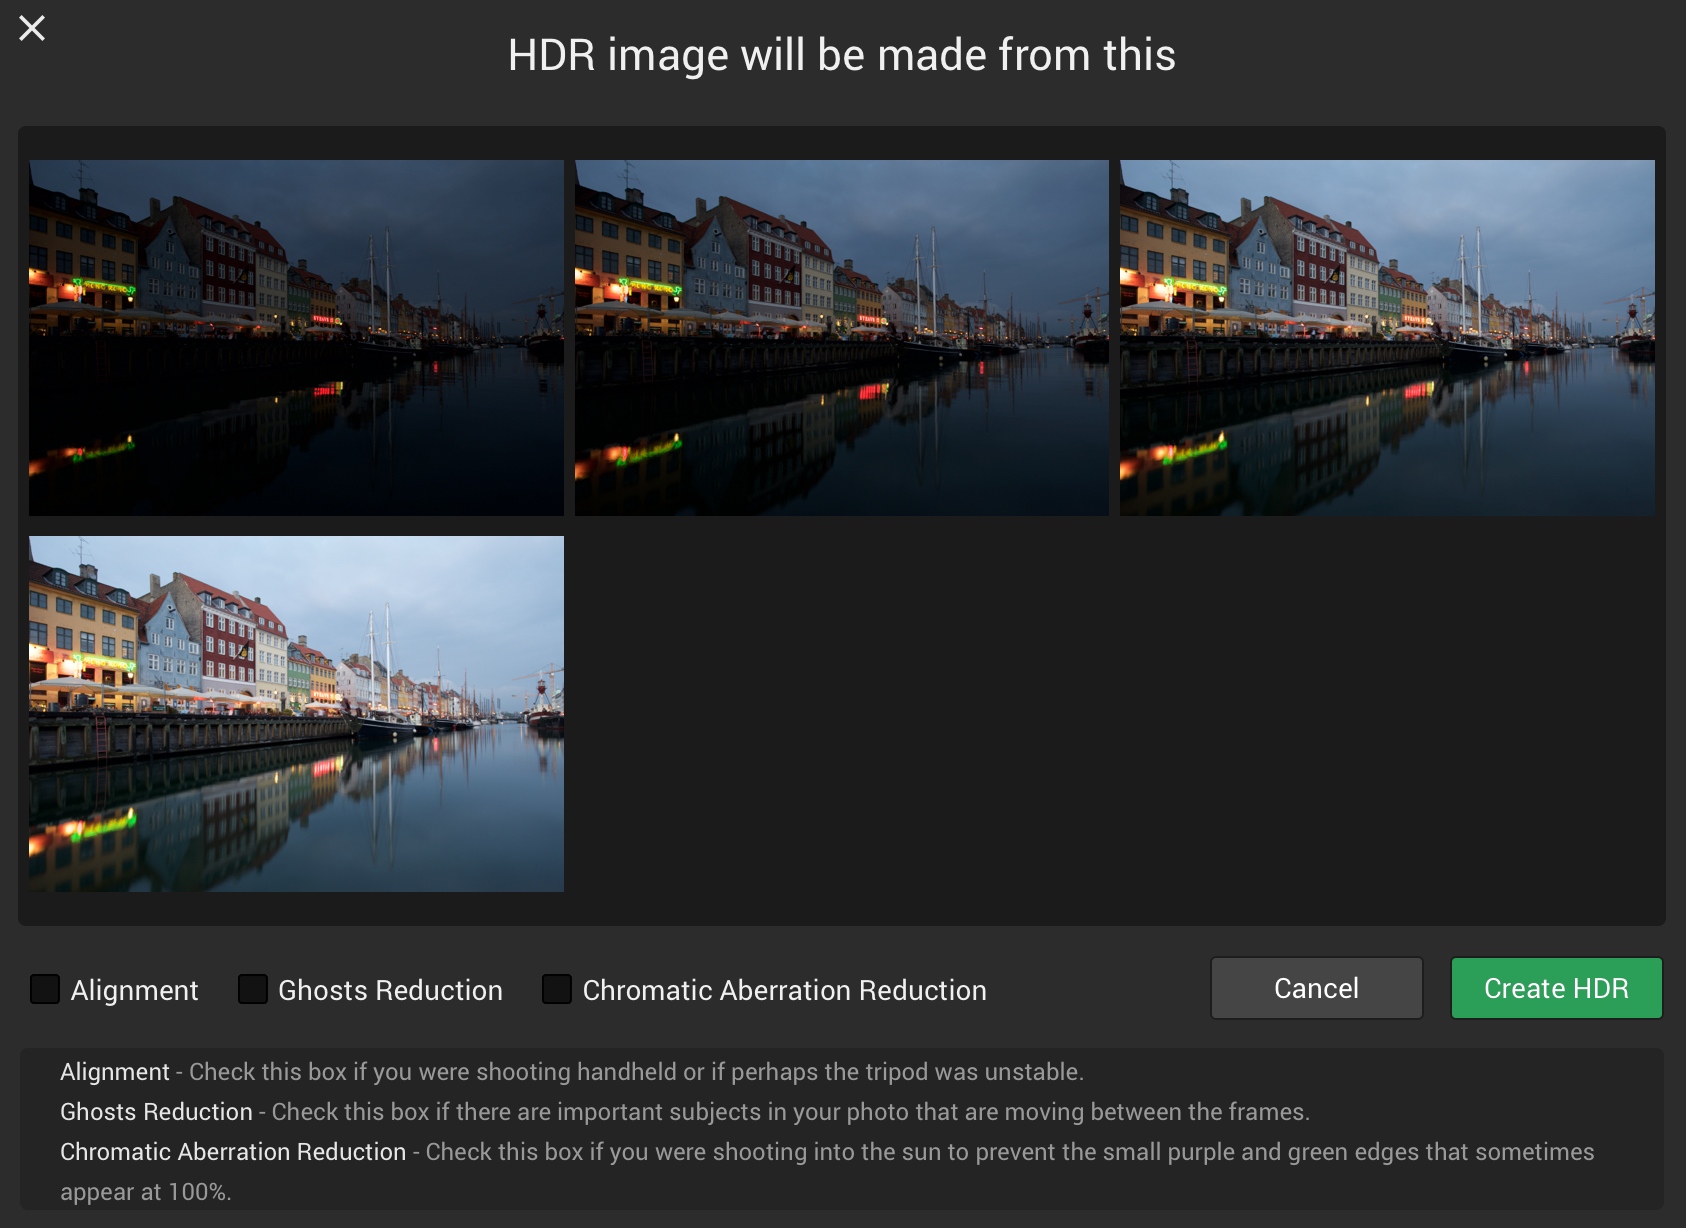
I originally took a bracket set of 7 photos but decided that I really only needed 4 of them to make the photo work. So, I started in Lightroom and exported the 4 files over to Aurora. This is the screen I first see when I do that:
I then just click on "Create HDR" and it merges the 4 photos into a single base HDR and drops it into Aurora. Here is what it looks like, prior to me adding any Presets to it:

From this point, it's all about getting creative and seeing what looks good, feels good, and makes you happy with your photo. I generally start with a Preset on the base layer anyways, just to give me some starting point from which to work.
In this image, I chose the Vivid Memories preset from the Realistic HDR category. Once I apply it to the image, it now looks like this:

Now keep in mind that the nature of a Preset is that it gets applied to the whole image. Since this is my base layer (Layer 0, I guess you would call it), the Vivid Memories preset is applied across the entire image (though as you can see, I reduced the opacity on this layer slightly). That was my desire anyways, so it's fine, and a fine starting point.
As you can see, the colors and details have both "popped" a little and the photo is showing quite a bit more vibrancy. I already like it better, and I really haven't done anything yet other than click a button.
But we are just getting started. The next thing I like to do is to make some adjustments to the sky and water. In many photos, I will apply the same edits to both sky and water, because I am often just reducing noise in those areas and smoothing them out a bit. I just like smooth skies and water, giving it sort of a calm, soothing look. The same applies for this photo, so that's what we'll do next.
My first step is to choose a Preset for the sky and water. I just click the + sign in the upper right next to the word Layers, name it "Sky and water", and then choose a Preset for it. In this case, I chose the Realistic Dreamy preset. I thought the look of the sky and water was pretty interesting in that preset, so I figured I could start there.
As I mentioned before, it applies this Preset to the entire photo, but since we are on a new layer, I just grab a brush and mask in the preset to the areas where I want it to be revealed (which is the sky and water). My mask looks like this:

So now that the mask covers the sky and water, the preset will be applied just in those areas. While I am at it, I also go in to the HDR DeNoise menu on the right hand panel, and make some adjustments there to reduce the noise in the sky and water (shown in the next photo), and I also reduced the saturation of the blue, since it was a little high for my taste.
Quick note: although you don't have to be exactly precise in your masking, I do recommend you take your time around definite edges, such as the tops of the buildings and the ships' masts in the photo above. It just gives you a little cleaner result. In this photo, I just masked it quickly so I could take a screenshot, as an example. On the video I do a little more finer work with it.
Here is a close up of the water, showing the smoothness it now has thanks to the HDR DeNoise settings that were applied (and which you can see in the right hand panel).
This made the sky and water very smooth, which I like, and reduced the noise considerably. In fact, it's reduced so much that I don't need to go use a noise reduction tool now. Thanks to Aurora and the power of Layers, I just saved myself a step in post-processing! I absolutely love that about using Aurora.

Next up is to adjust the buildings. Once again, I want to do this on a separate layer, so I click on the + sign again, add a new layer, name it Buildings, and choose a Preset for it. This time, I choose the Balanced & Realistic preset from the Realistic HDR category (that's the category I find myself in time and time again).
It gets applied to the whole image, which I don't want, so I grab a brush and just brush in the adjustment to the buildings, using a mask. I could also copy the mask from the sky and water layer and invert it, since it's basically the opposite of that mask. Here's a screenshot of the mask:

And here is what the photo looks like when I hide the masking, displaying the photo with the mask applied to the buildings:

After this, I made some minor saturation reductions again, as I felt it was a little too strong. While I do like punchy colors, I wanted to tame this one a little bit. Maybe I'm softening up as I get older? ;-)
You could technically add more layers and continue to make adjustments (and in the video, I give you a couple of other examples), assuming there were other things you wanted to do with the photo. Since it's so easy with Aurora, it does get really tempting at times to just layer and layer again and again! There's really no limit on what you can do, other than your creativity, or needing to go attend to something more important. :-)
After all these edits and layer work (which really, only takes a few minutes), I ended up with the photo below. While the video is about 15 minutes, if I wasn't recording it, I would have spent less than 10 minutes on the photo, in total, since all my blabbering slows me down a little bit. ;-)
Here is a summary of what all I did to the photo:
- Took 4 RAW files from Lightroom, exported to Aurora HDR Pro, and merged them into a base HDR photo
- Added a preset to the base layer and slightly reduced the opacity
- Created a layer for the sky and water, added a preset to that layer, brushed in a mask just for the sky and water portions of the photo to selectively apply the preset, reduced blue saturation, and performed noise reduction in the sky and water sections of the photo
- Created a layer for the buildings, added a preset to that layer, brushed in a mask just for the buildings to selectively apply the preset, and once again slightly reduced saturation
- Saved the photo back to Lightroom where I removed a few dust spots, slightly bumped up the Clarity, and once again slightly reduced the overall saturation
So after these edits, I end up with the photo below. To my eye, it correctly represents the scene and thanks to the use of HDR and the various layers, I am able to selectively control what happens in specific parts of the scene (smooth skies, smooth water, details evident in the buildings, etc). It's quite fun, quite easy and thus quite quick to perform all of this on a photo, and just gets easier and quicker the more you use it. I already find myself just cruising right through an edit pretty quickly, and I have only been using Aurora for a few weeks now.
That's it - thanks for stopping by! If you want to download a free trial of Aurora, you can do that here.