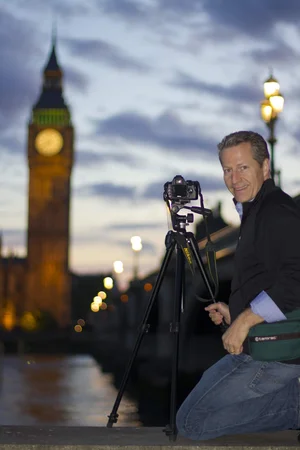
The Importance of Masking
The Importance of Masking
Masking is the most important editing skill there is - period. I’ve said this in many videos, and that’s because it’s true.
One of the biggest differences between a good edit and a great edit often isn't the adjustment itself - it’s where that adjustment is applied.
That’s what masking is all about.
Once you learn how to apply masks to your images, your editing results will improve dramatically.
Masking is about control. It’s about applying the right adjustment to light, detail, and color in the right place, and then blending it into the rest of the image so that it’s not obvious.
I use masks on every image that I edit. Some are just quick and simple, like a brush mask or radial gradient, but some get a bit more involved and take longer. It depends on the image, and of course on what it is I am doing to the image.
Editing always comes back to light, detail, and color - and being able to apply each of these selectively and with intention is what masking is all about.
Masks let you stop treating the entire photo the same way.
Not only do your results improve, but the viewer is rewarded with a more pleasing photo to view, as well.
Every adjustment has two parts: the tool and the target. You choose the tool. Masks define the target.
Masks Help You Control Light
My editing workflow is based on light, detail, and color - all of which benefit from masking.
I always start with global edits - in Luminar Neo that is Develop RAW, Supercontrast, and sometimes Light Depth. But once I’m done with those three tools, it’s all about masking.
With light being the first thing I edit for, it’s the first thing that I apply masks for as well. Sure, the first three global edits do a great job of handling the light for me, but coming back with Develop a second, third, or fourth time can really dial in some targeted light adjustments that really make a difference.
Masks let you guide the viewer’s eye and tell them where to look. Brighter objects get attention, and darker objects get overlooked. Think about that while editing and use masks to guide the viewer through your photograph.
Masks Help You Control Detail
I don’t add a lot of detail to my photos - in fact, I often soften them a bit - but when I do add it, a mask makes it work for the image.
Just think if you added some texture or structure to an image - you wouldn’t want it all over the photo, would you? Of course not. So that is why masking is key here.
Detail attracts attention. If everything is sharp and textured, nothing stands out. Masks let you decide exactly where to add detail - and just as importantly, where to leave it alone.
Apply detail where viewers naturally look. Draw in the viewer’s eye. Make your subject pop a little.
Masks Help You Control Color
This is something many people don't think about. Many people apply color (specifically Saturation and Vibrance) across an entire image. It’s very rare for that to look good. That’s because those tools will add equal amounts of color to everything in the photo.
Usually, color works best when it is masked. You can emphasize a subject, or accentuate a sky, for example. But you can also tone down distracting or overpowering colors with masks.
Not every color adjustment belongs everywhere. Use a mask to make it specific.
Masks Make Edits Invisible
One hallmark of an amateur edit is that you can see the editing. A hallmark of a polished edit is that you notice the photograph instead.
Masks help create that.
The goal isn't for someone to admire your masking. It's for them to admire your photograph. You want the edits to disappear into each other, and masking (with controlled feathering along the edges) makes that happen.
Masks Give You Confidence
My photography and editing is self-taught. No one was there to guide me and tell me what worked and what didn’t work. So of course I made a lot of mistakes.
As a result, I wasn’t confident in my images for many years - even though I liked them and generally got decent feedback via social media and my blog.
But once I became comfortable with masking and learned to really control my edits, I trusted my editing more. I knew I could guide the viewer's eye instead of hoping a global adjustment would work.
When you don’t control your edit, very specifically, you may become hesitant to share. Masks remove that fear because you know you can get results that are eye-pleasing.
This shift often encourages more creative editing, deeper learning, and experimentation with other tools.
You Don't Need Complicated Masks
Many photographers think masking means spending thirty minutes painting selections, slowly and meticulously. But that isn’t true.
Many of my edits use surprisingly simple masks.
These days it’s easy to create a great mask, and Luminar Neo’s masking tools give me the power and control to get it done quickly AND accurately.
With tools like Object Select, luminosity masking and color masking (plus others), you can dial in your edits and create a photo you are proud of.
Conclusion
I don't think about masking as an advanced technique anymore. I think about it as the natural way to edit a photograph.
Global edits establish the foundation of an image. Masks refine and personalize it. They let you shape the light, guide the viewer's eye, add detail where it matters, and control color with intention.
That's why masking changes the way you think about editing. It isn't about creating complicated selections or showing off advanced techniques. It's about giving every adjustment a purpose.
When every adjustment has a purpose, your edits become more intentional.
When your edits become more intentional, your photographs become more compelling.
And in the end, that's what we're all trying to create.
Want to learn masking in Luminar Neo in more depth?
If you'd like to become more comfortable with masking in Luminar Neo, my Luminar Neo Masking Masterclass walks through the techniques, workflows, and real-world examples I use every day. It's designed to help you move beyond global edits and start making more intentional photographs.
Want to learn more about Luminar? Join my newsletter and get my FREE Editing Guide and Editing Framework!