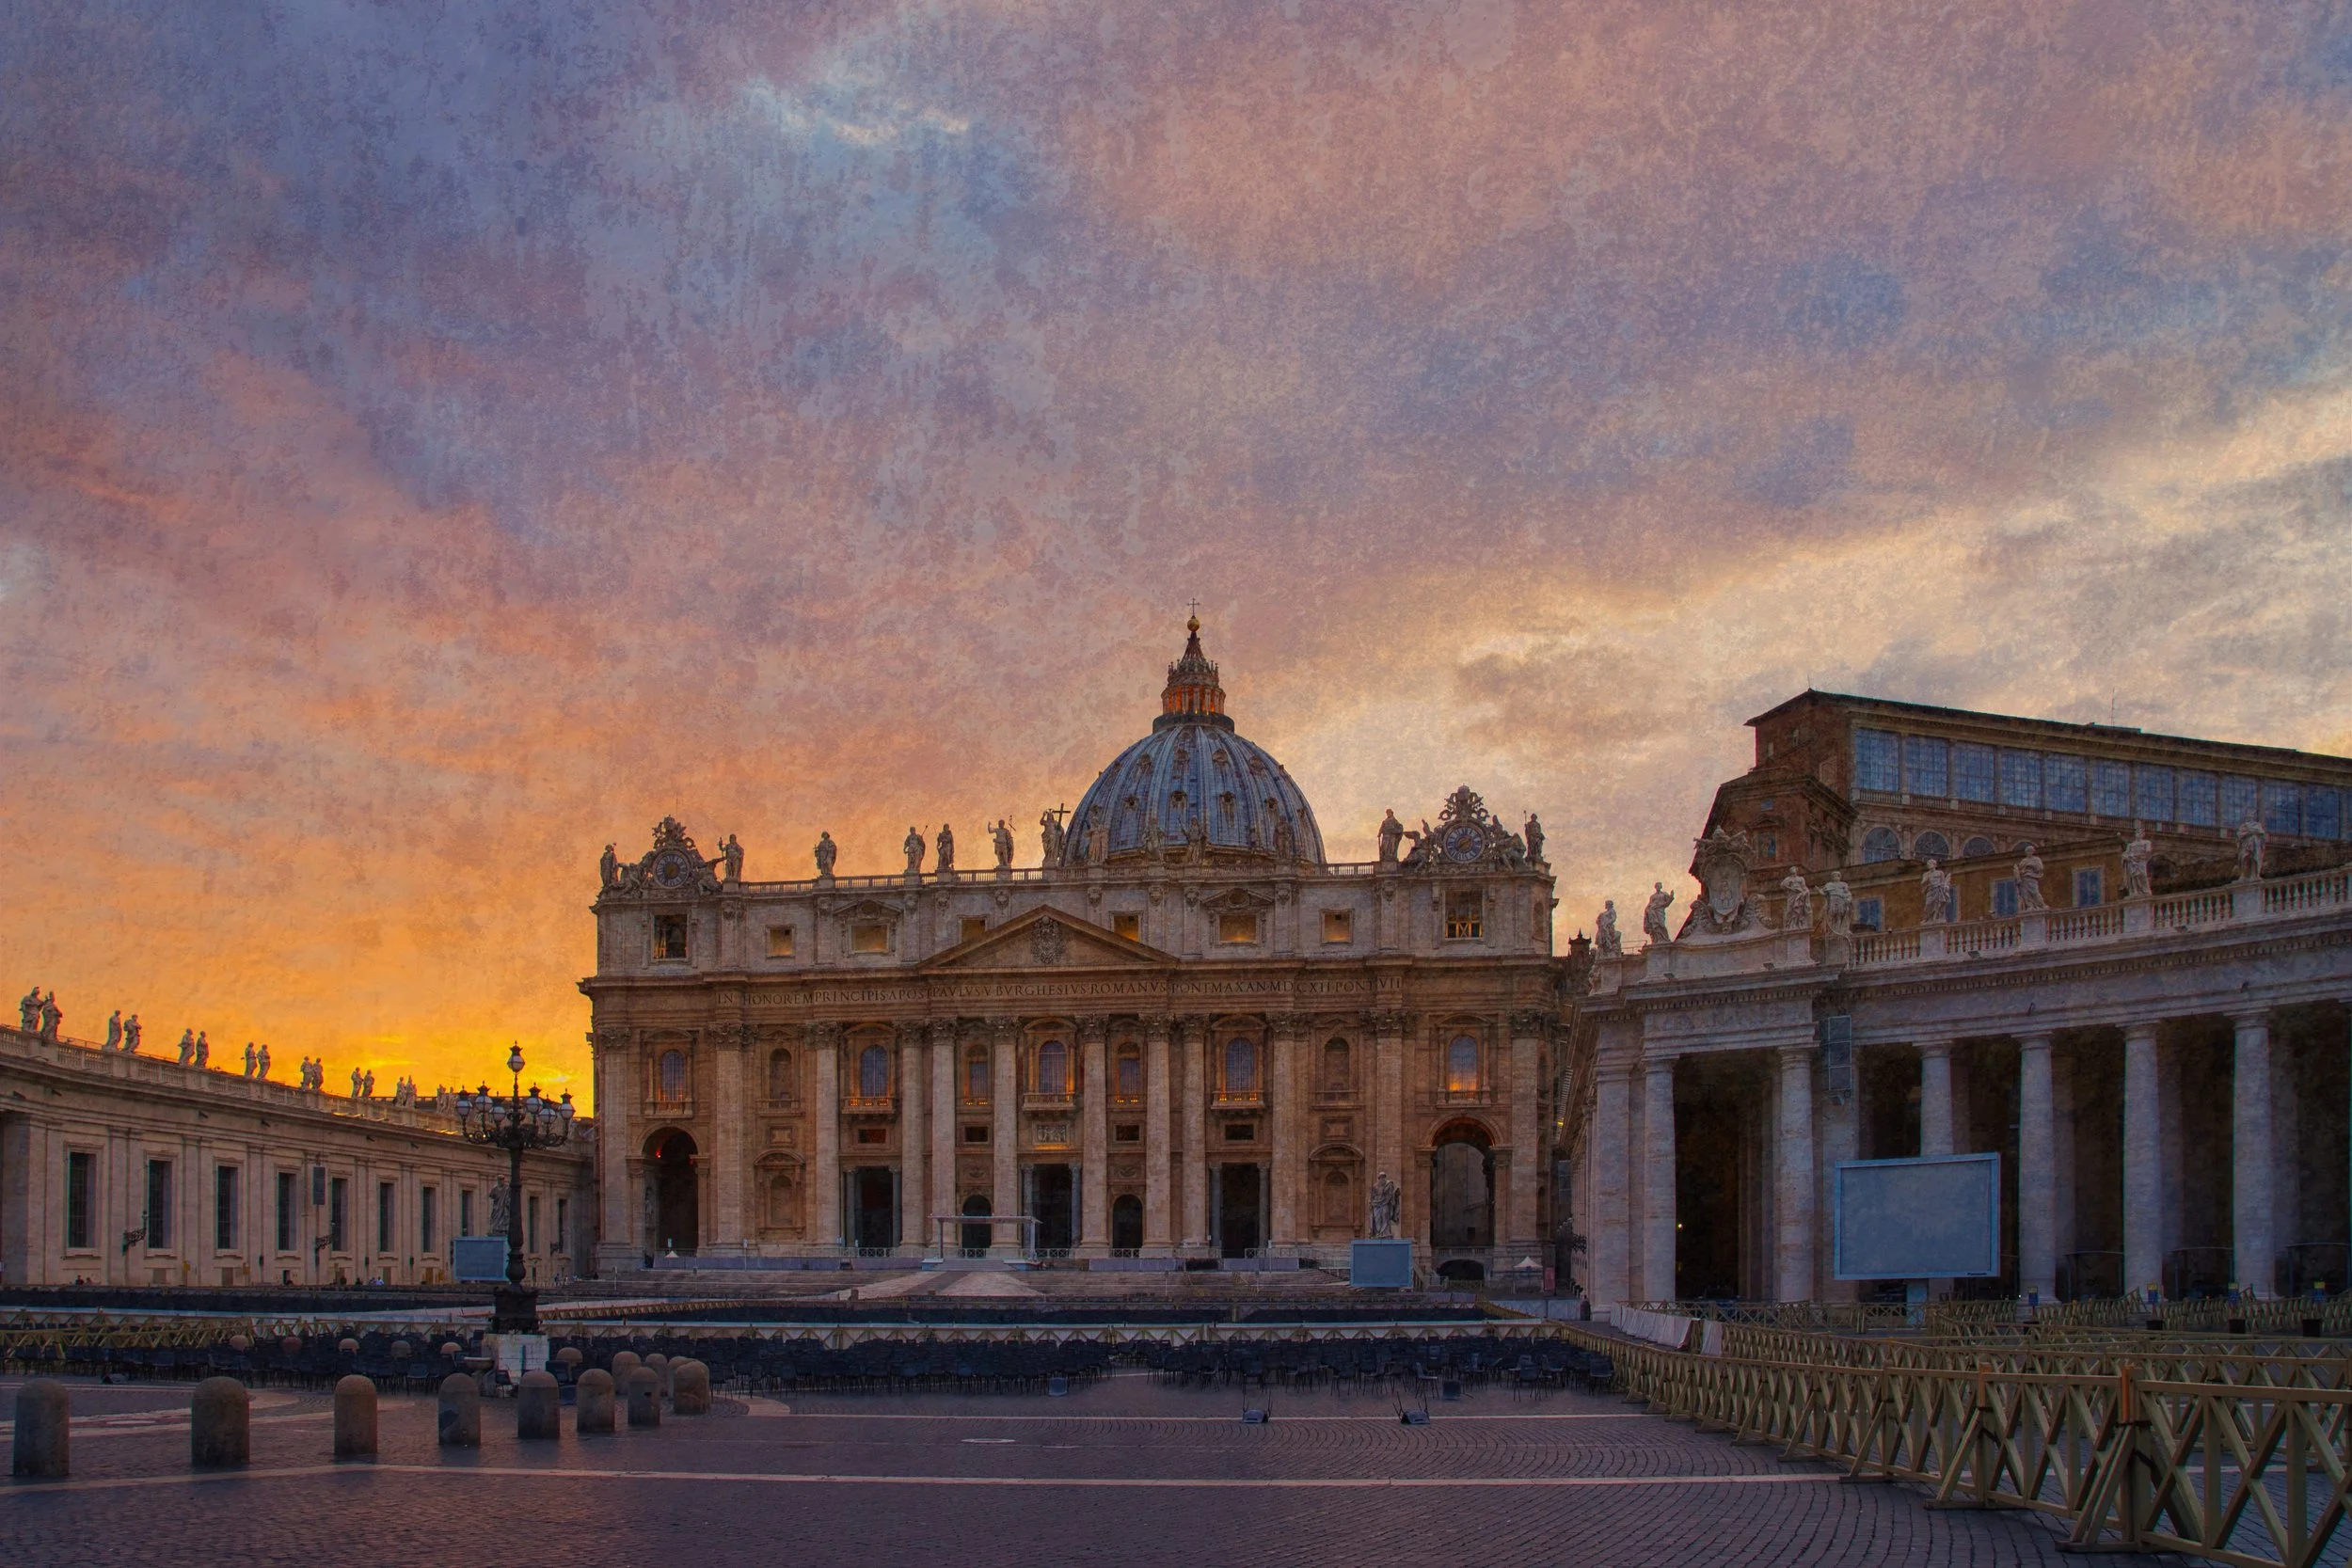
 Image 1 of 5
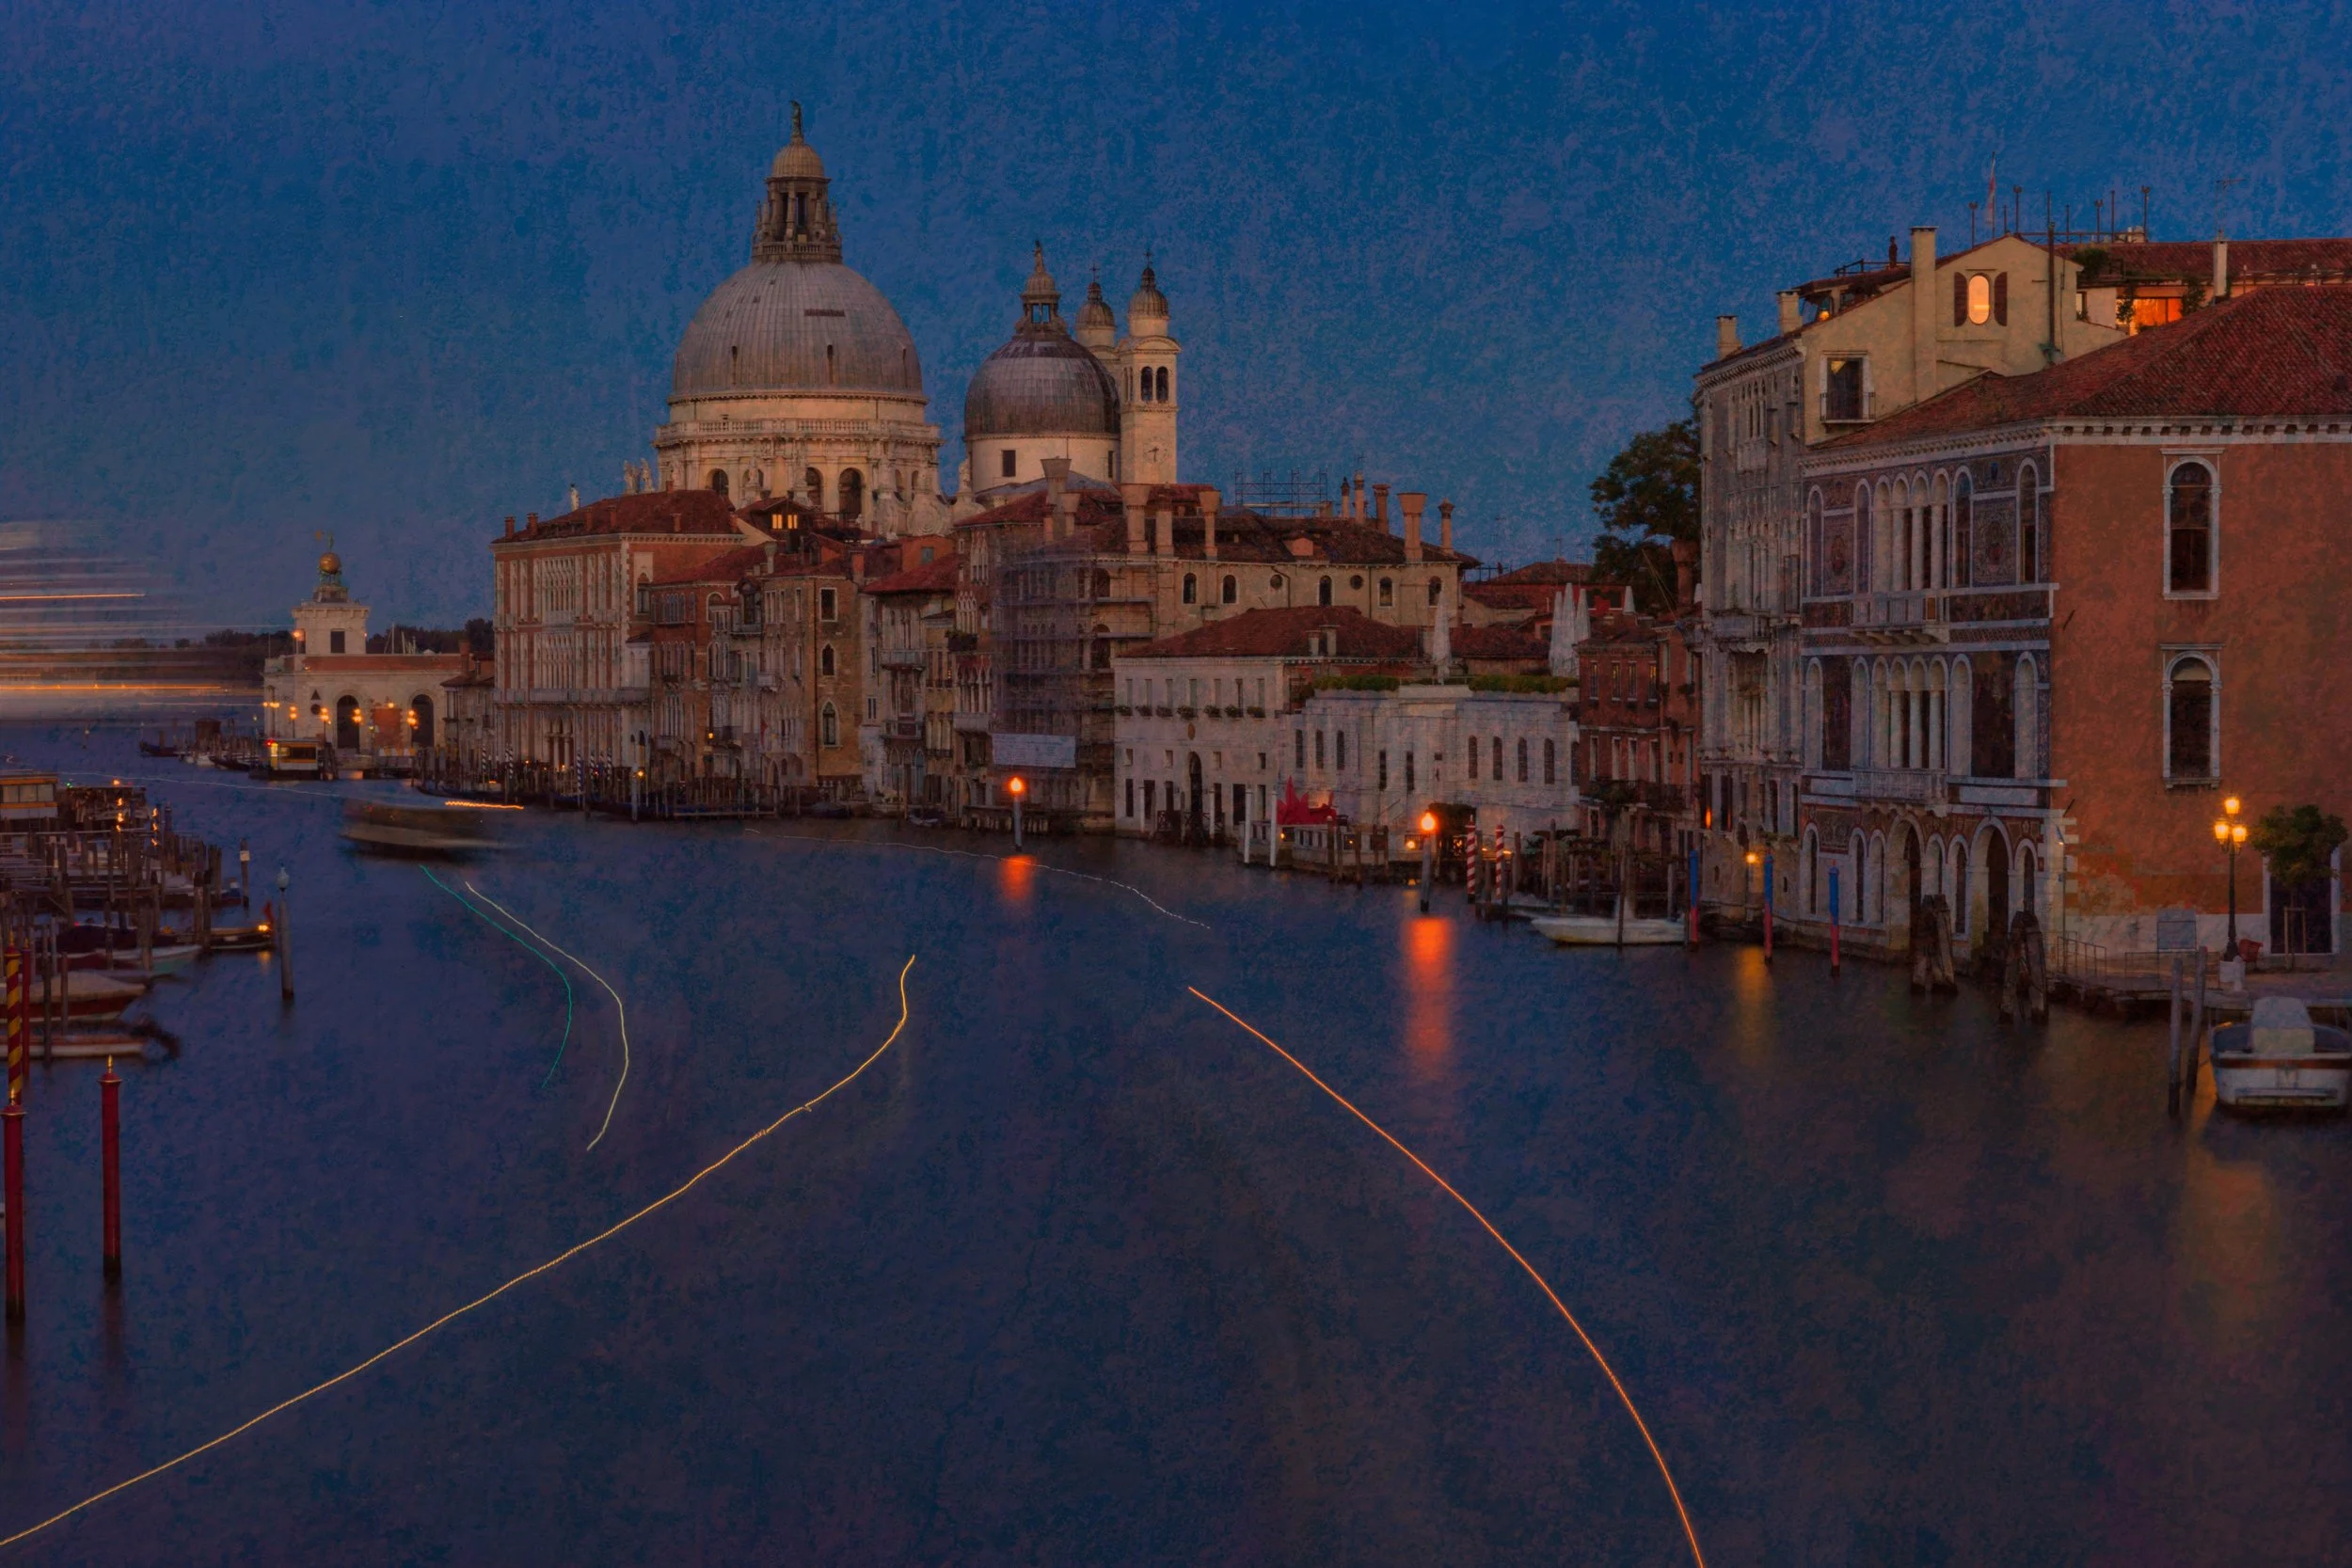
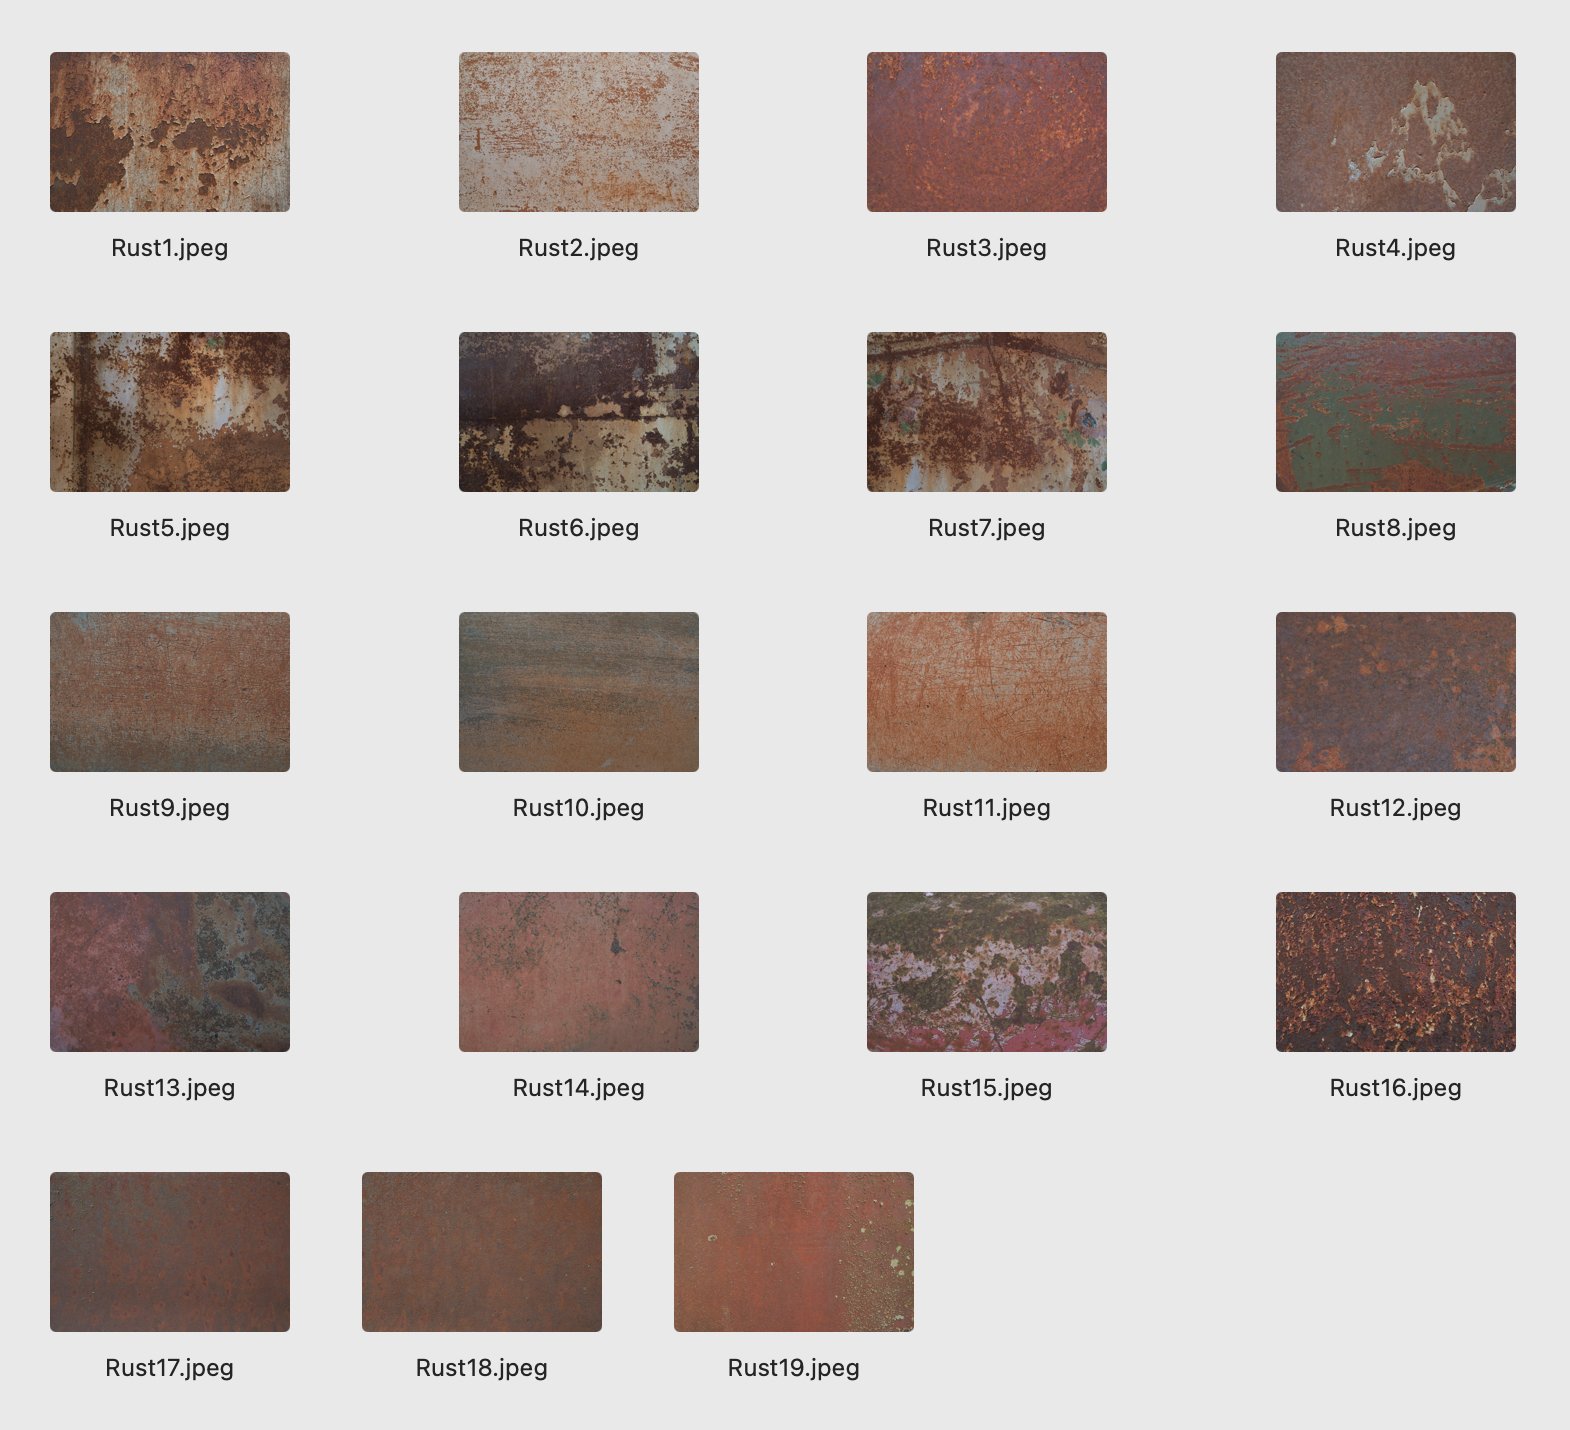 Image 2 of 5
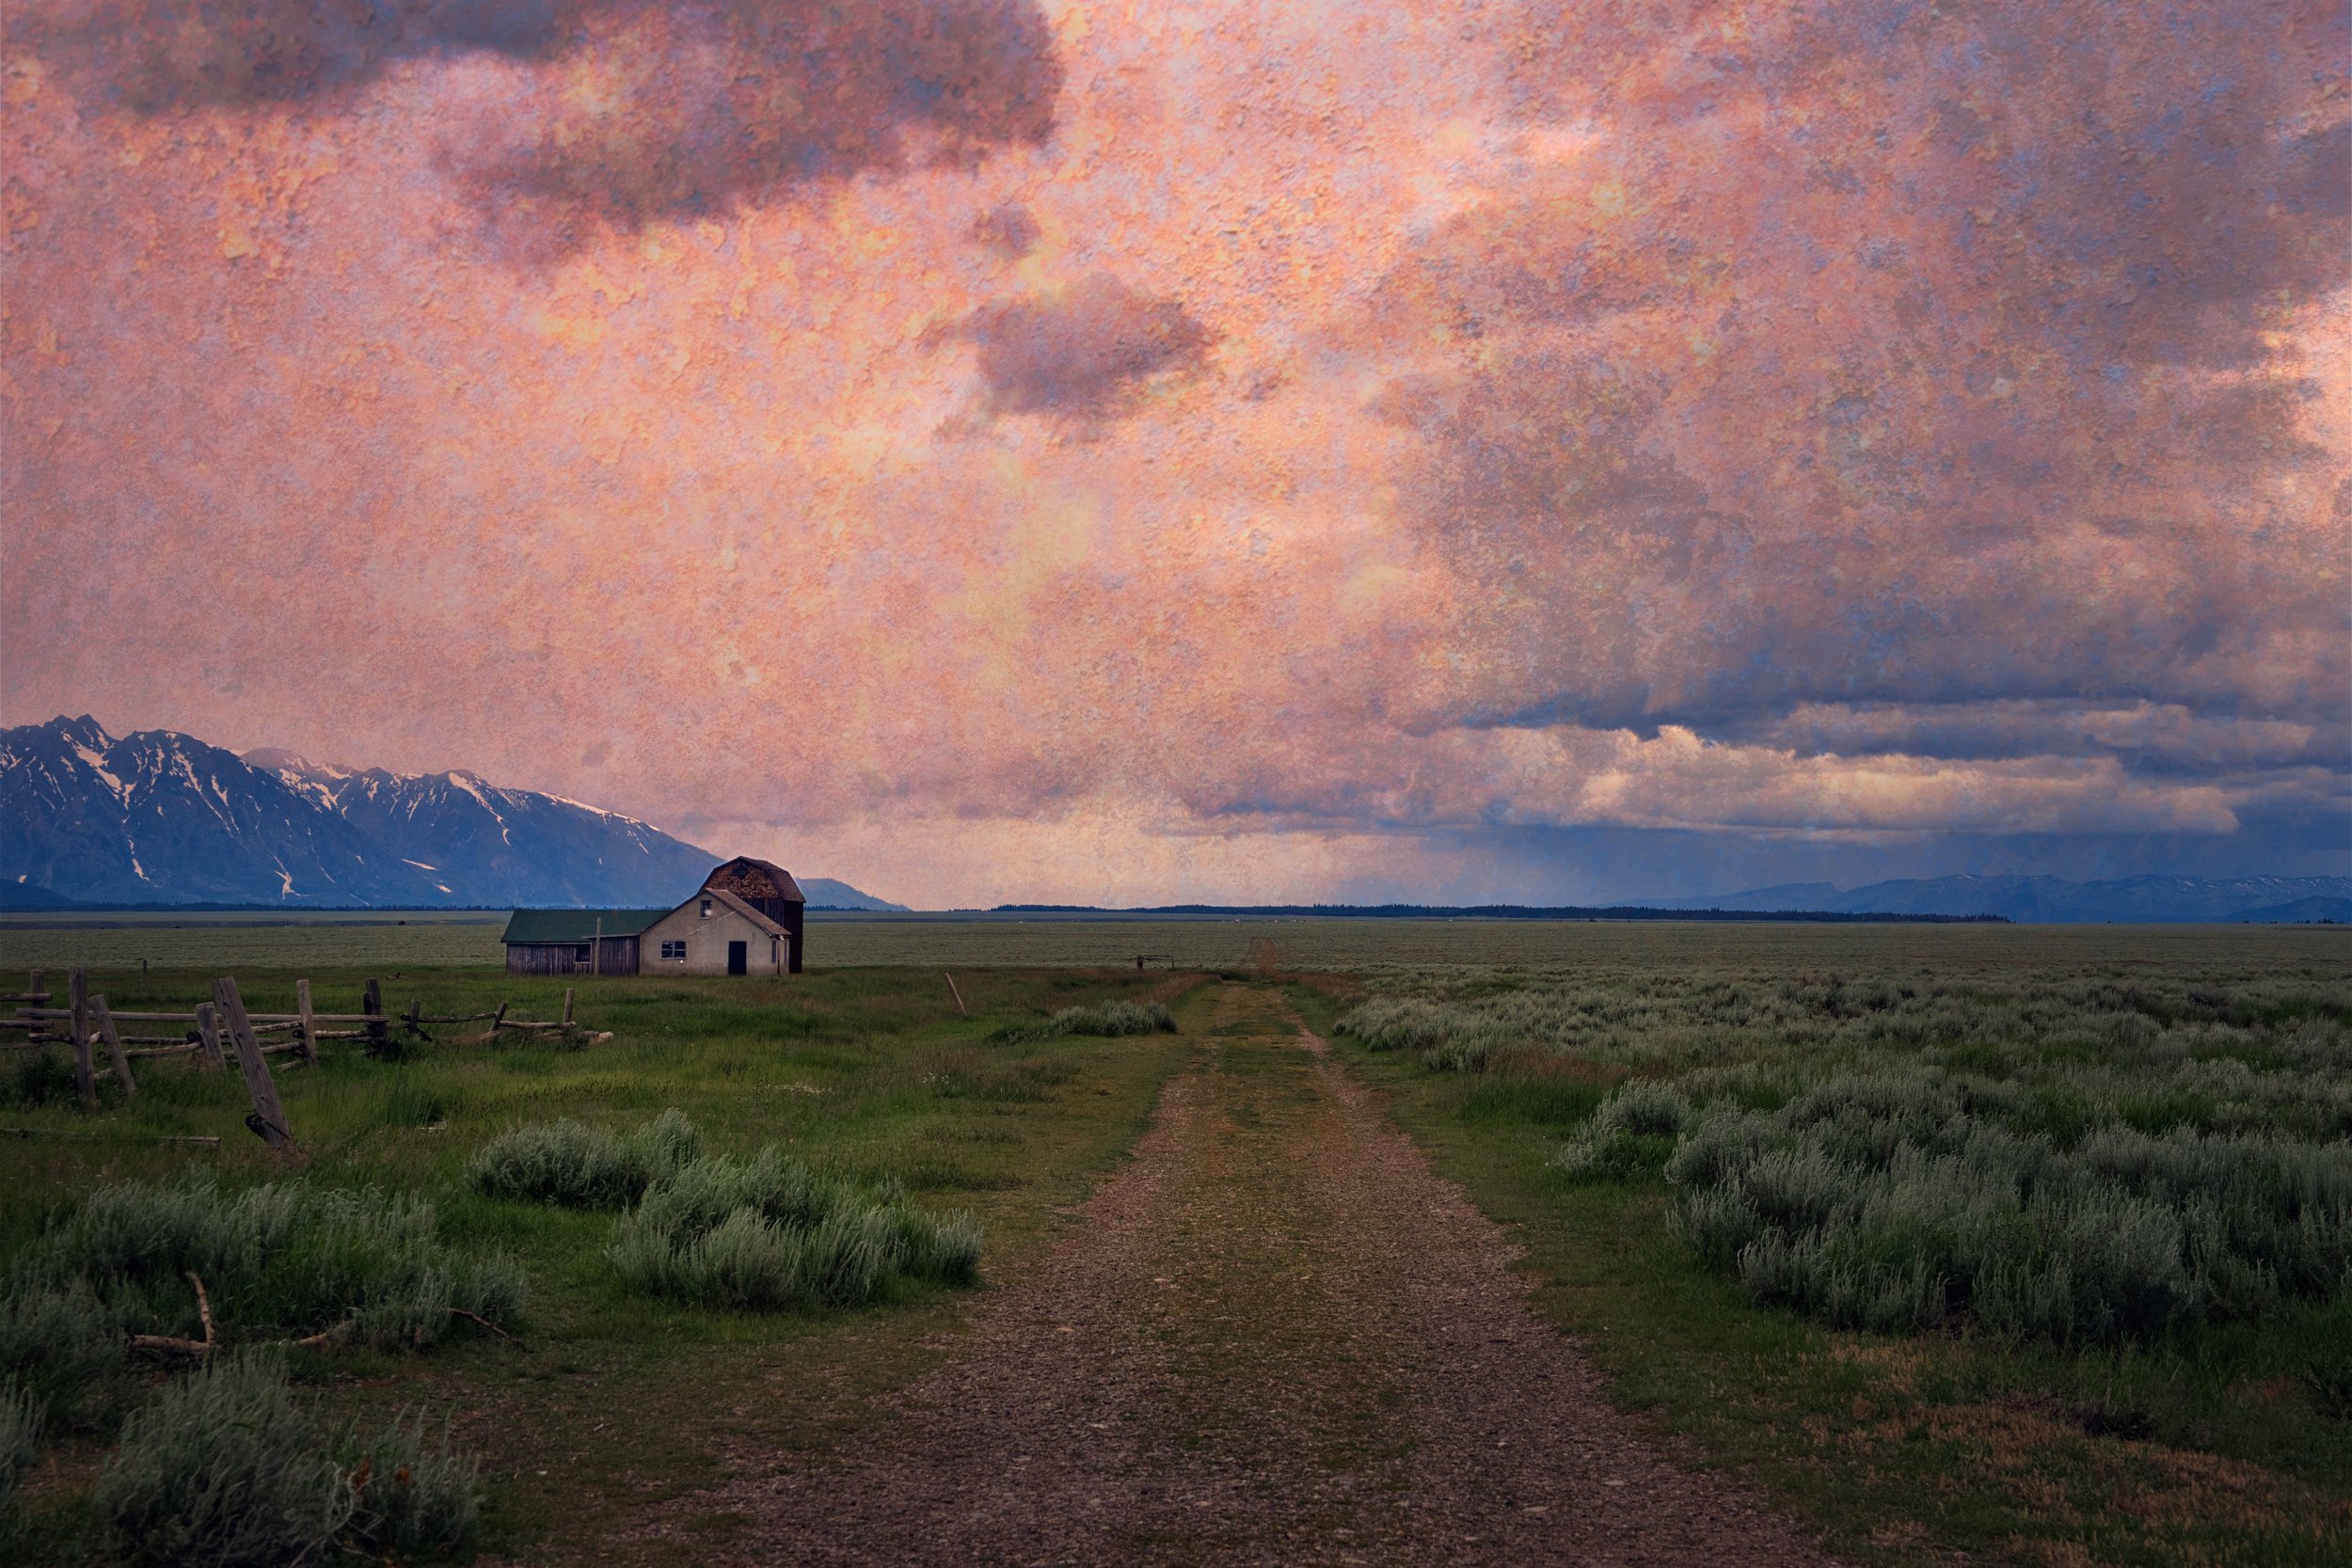 Image 3 of 5
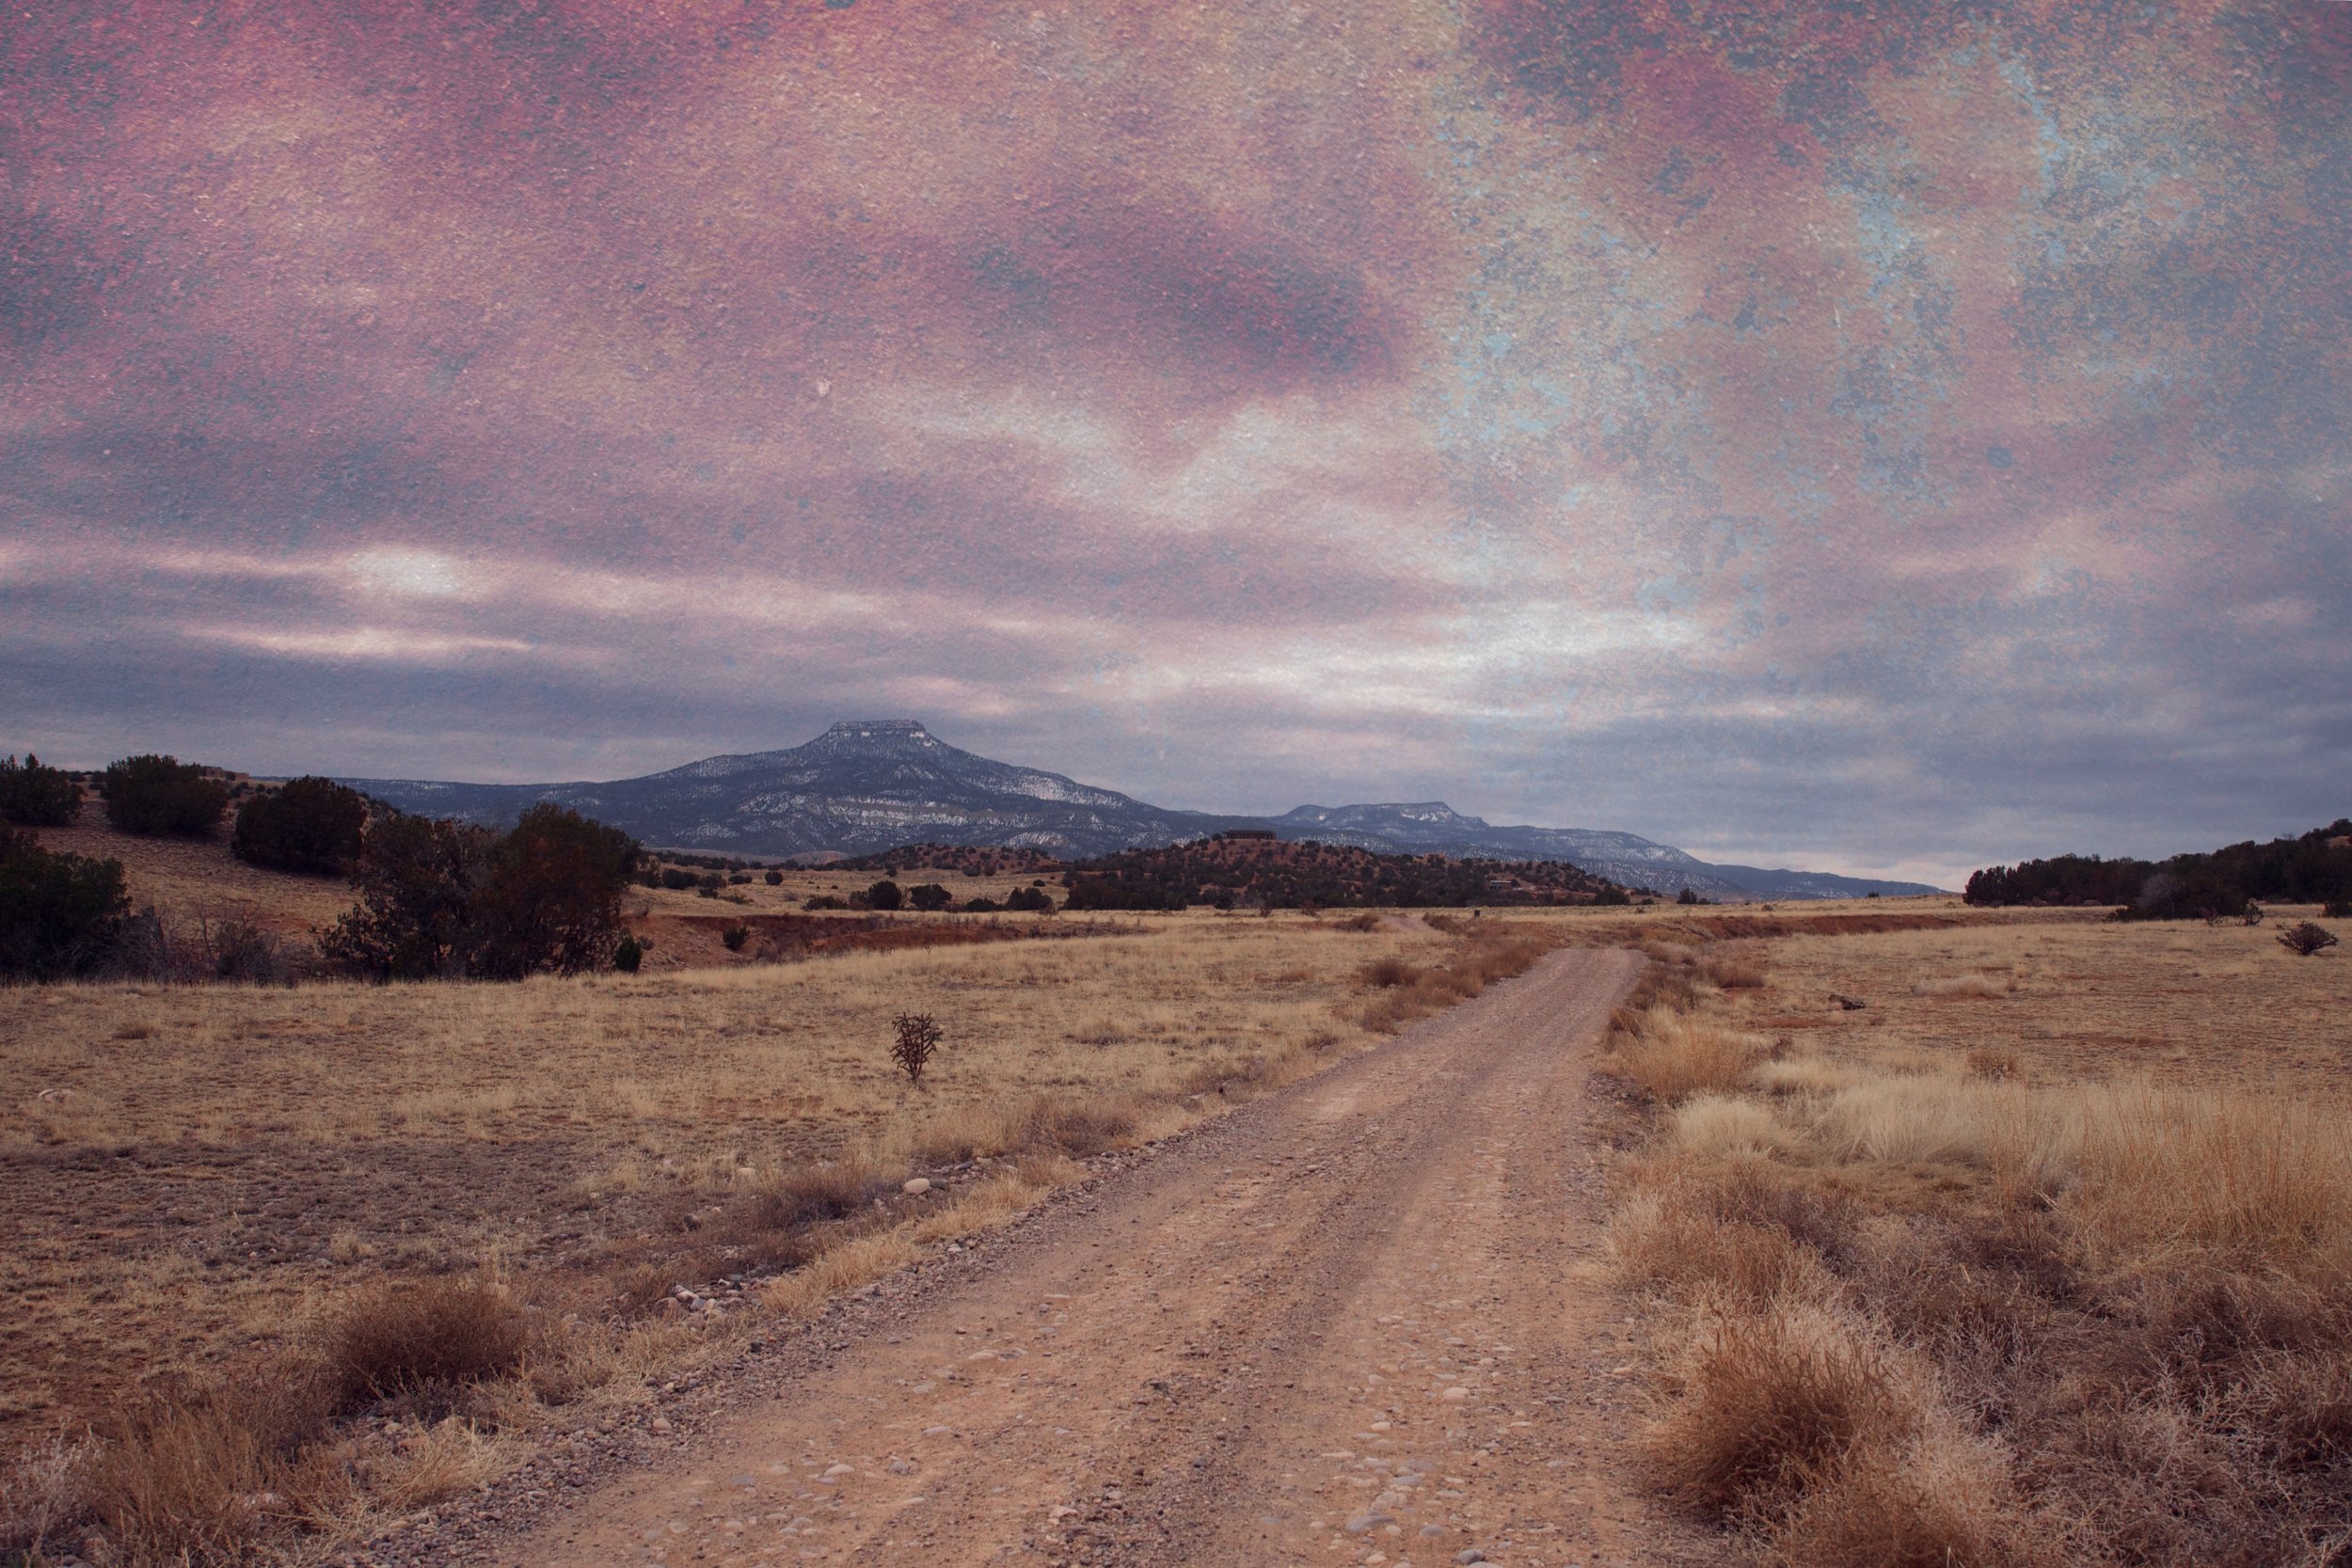 Image 4 of 5
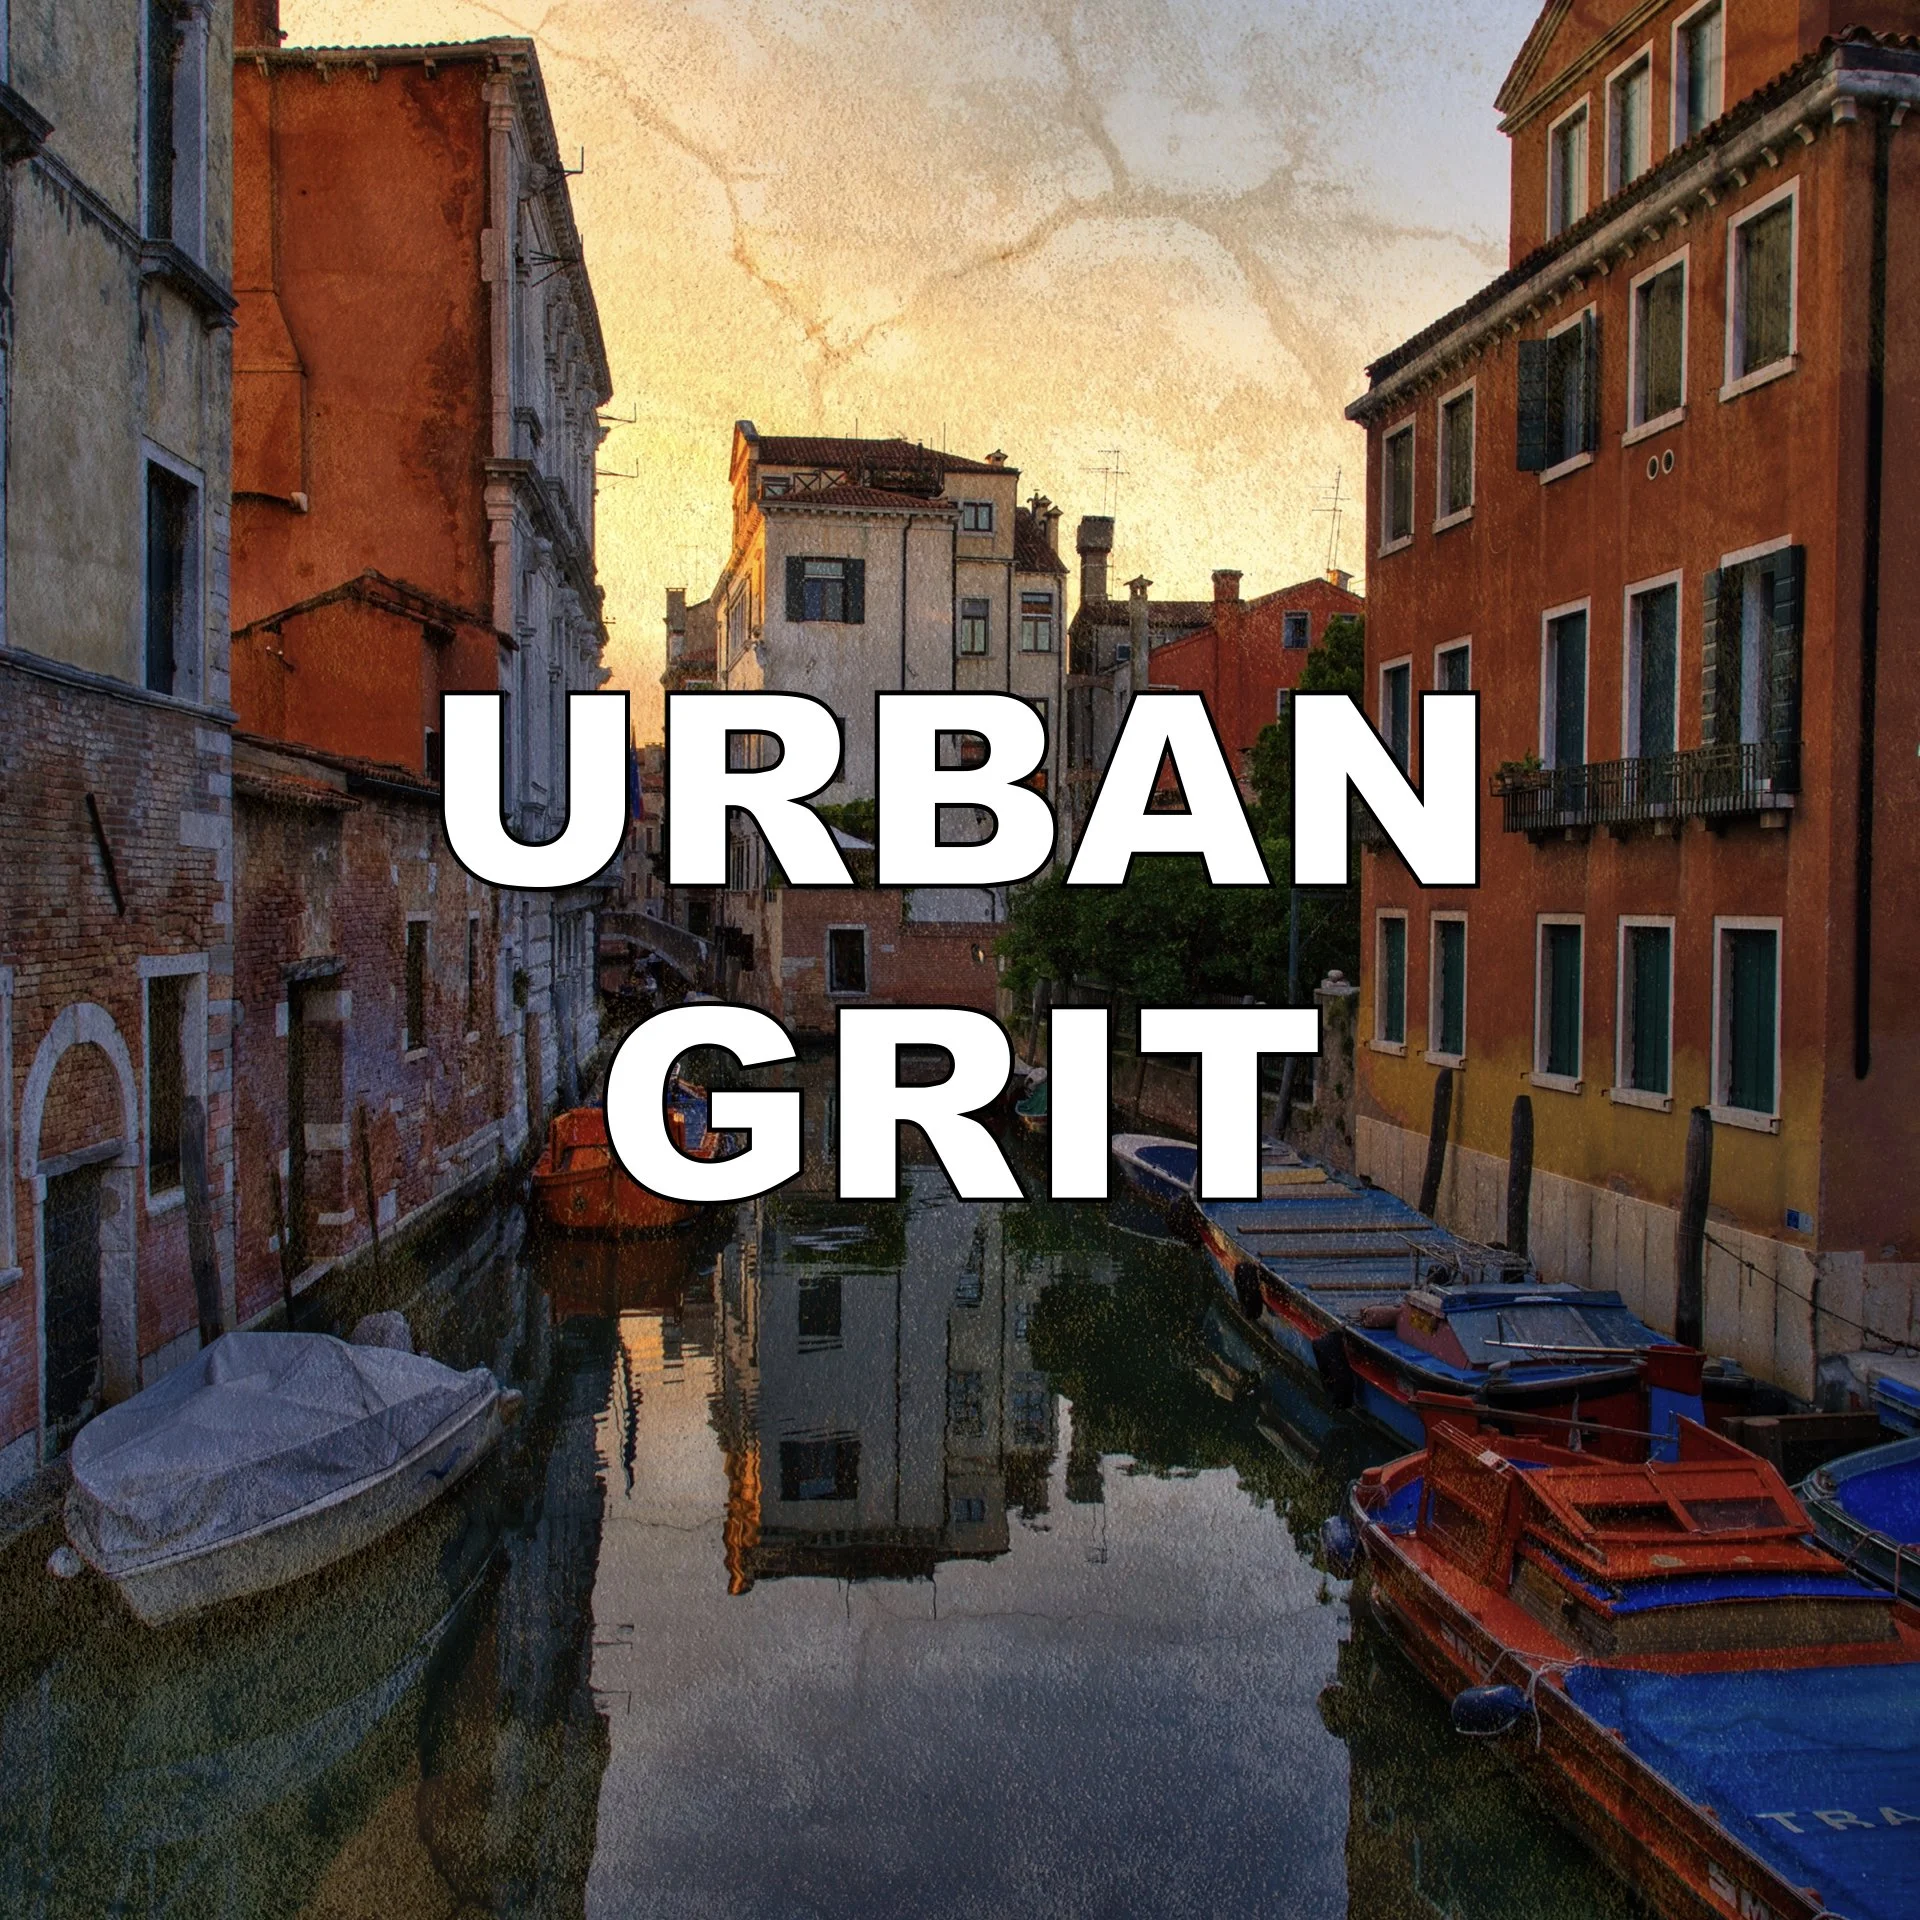
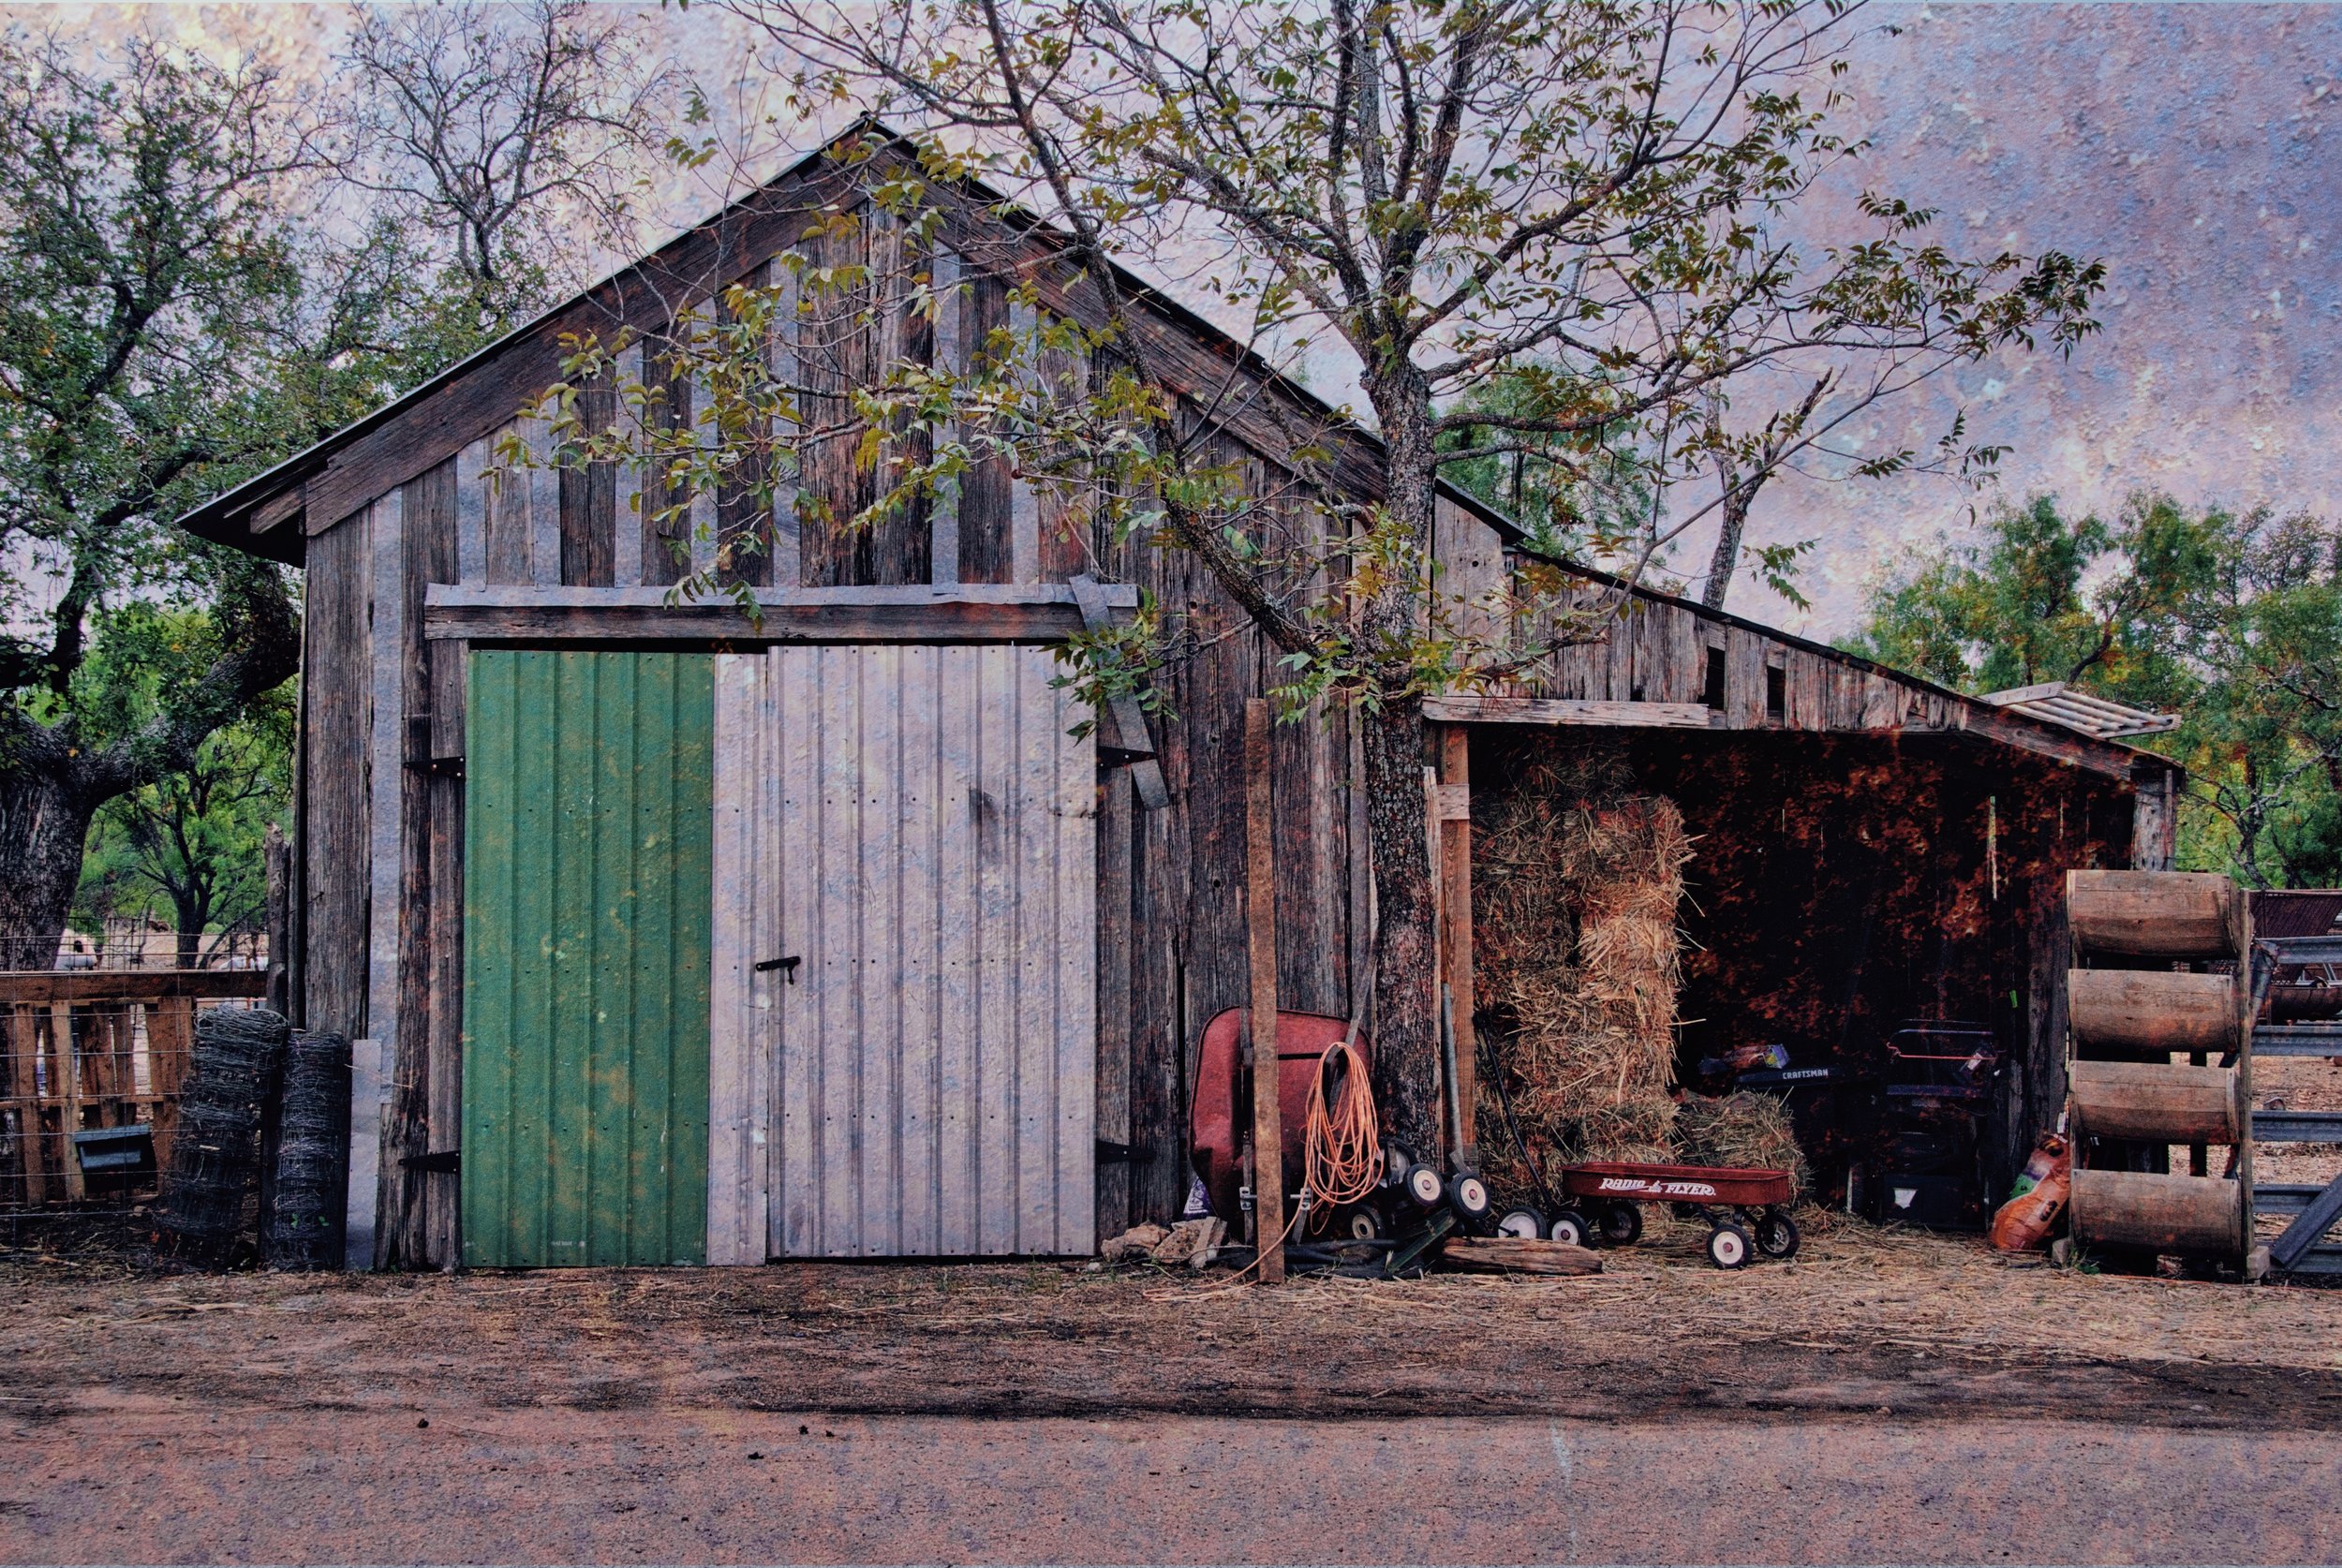 Image 5 of 5
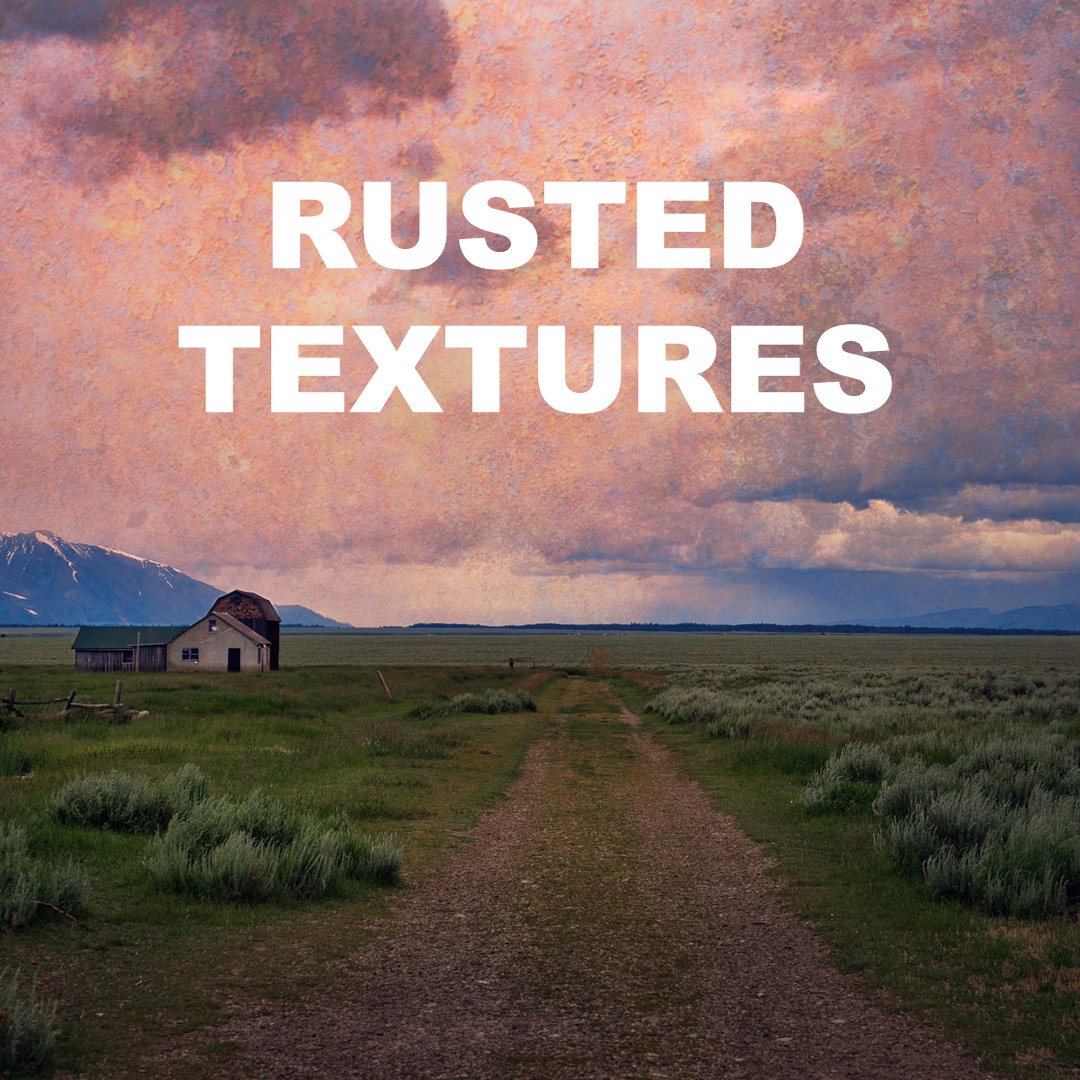
Rusted Texture Collection

🖼 Use Them For:
Urban street photography with grit and atmosphere
Artistic portraits with texture and edge
Abstract or conceptual images
Vintage or aged aesthetic in composites and overlays
Unique landscapes
⚙️ Take Your Edits Beyond Clean & Polished
Add grit. Tell a story. Let the rust in. With the Rusted Texture Collection, you can instantly layer emotion, character, and time-worn beauty into your work.
Over the years I have embraced using textures as a component in my photographs. They can add an interesting and unique look to a photo, and they offer the option of interpreting a scene in an entirely new and artistic way. It’s fun!
During my photo outings I have been collecting textures whenever I find something that looks interesting. I find that rusted and decaying stuff makes for some very beautiful, interesting and useful textures. I have been using these on my photos for a while now, testing them out with different styles of photos and find these to be the most flexible and adaptable to various types of photos, from cityscapes to landscapes and even portrait backgrounds.
Tips for Applying Textures to Photos
Here are some tips on how I use textures in my photos in Luminar, but you can apply a texture in any editing program that allows you to create new layers:
Once the new texture layer is applied, I reduce the opacity to about 25% to start. This gives me plenty of visibility of the image underneath, and I can always go back and change the opacity if I want to.
Consider applying additional filters/effects on a new merged layer after you have added the texture. I generally experiment with color tones, contrast, details and light once the texture layer is applied.
Sometimes I will take an already-edited photo and apply a texture, and sometime I will apply a texture before any edits. Experiment and see what you come up with.
If you don’t like the color of the texture, you can use Color Balance, Color Temperature, Curves and other filters in Luminar to change the general color of it, so it more closely resembles the look you are trying to achieve.
Consider using the eraser to remove the texture at a reduced opacity from some parts of the image. Sometimes it looks better when an already-busy section of a photo has a lower opacity of the texture, leaving the higher-opacity parts for sections of the photo that are plain, such as an empty sky.
You can stack multiple textures for even more creative results.
Experiment with blend modes to see how changing them can impact the look of the photo. You can get some really varied looks just by doing this. The two I use most are Normal and Overlay, but each photo is different and it is worth experimenting to see how they impact the shot.
Have fun!
Fine print:
Jim Nix/JimNix.com retains full ownership rights to these textures under any and all applicable copyright and intellectual property laws.
The purchase of these textures is for personal or commercial photographic purposes. By purchasing you agree that you will not resell, redistribute, bundle or otherwise profit from these textures in any way other than as a composite layer within your own photographic or graphic design work.
You do have the right to modify these textures while using them in your own creations.
Sharing of these files is strictly prohibited.
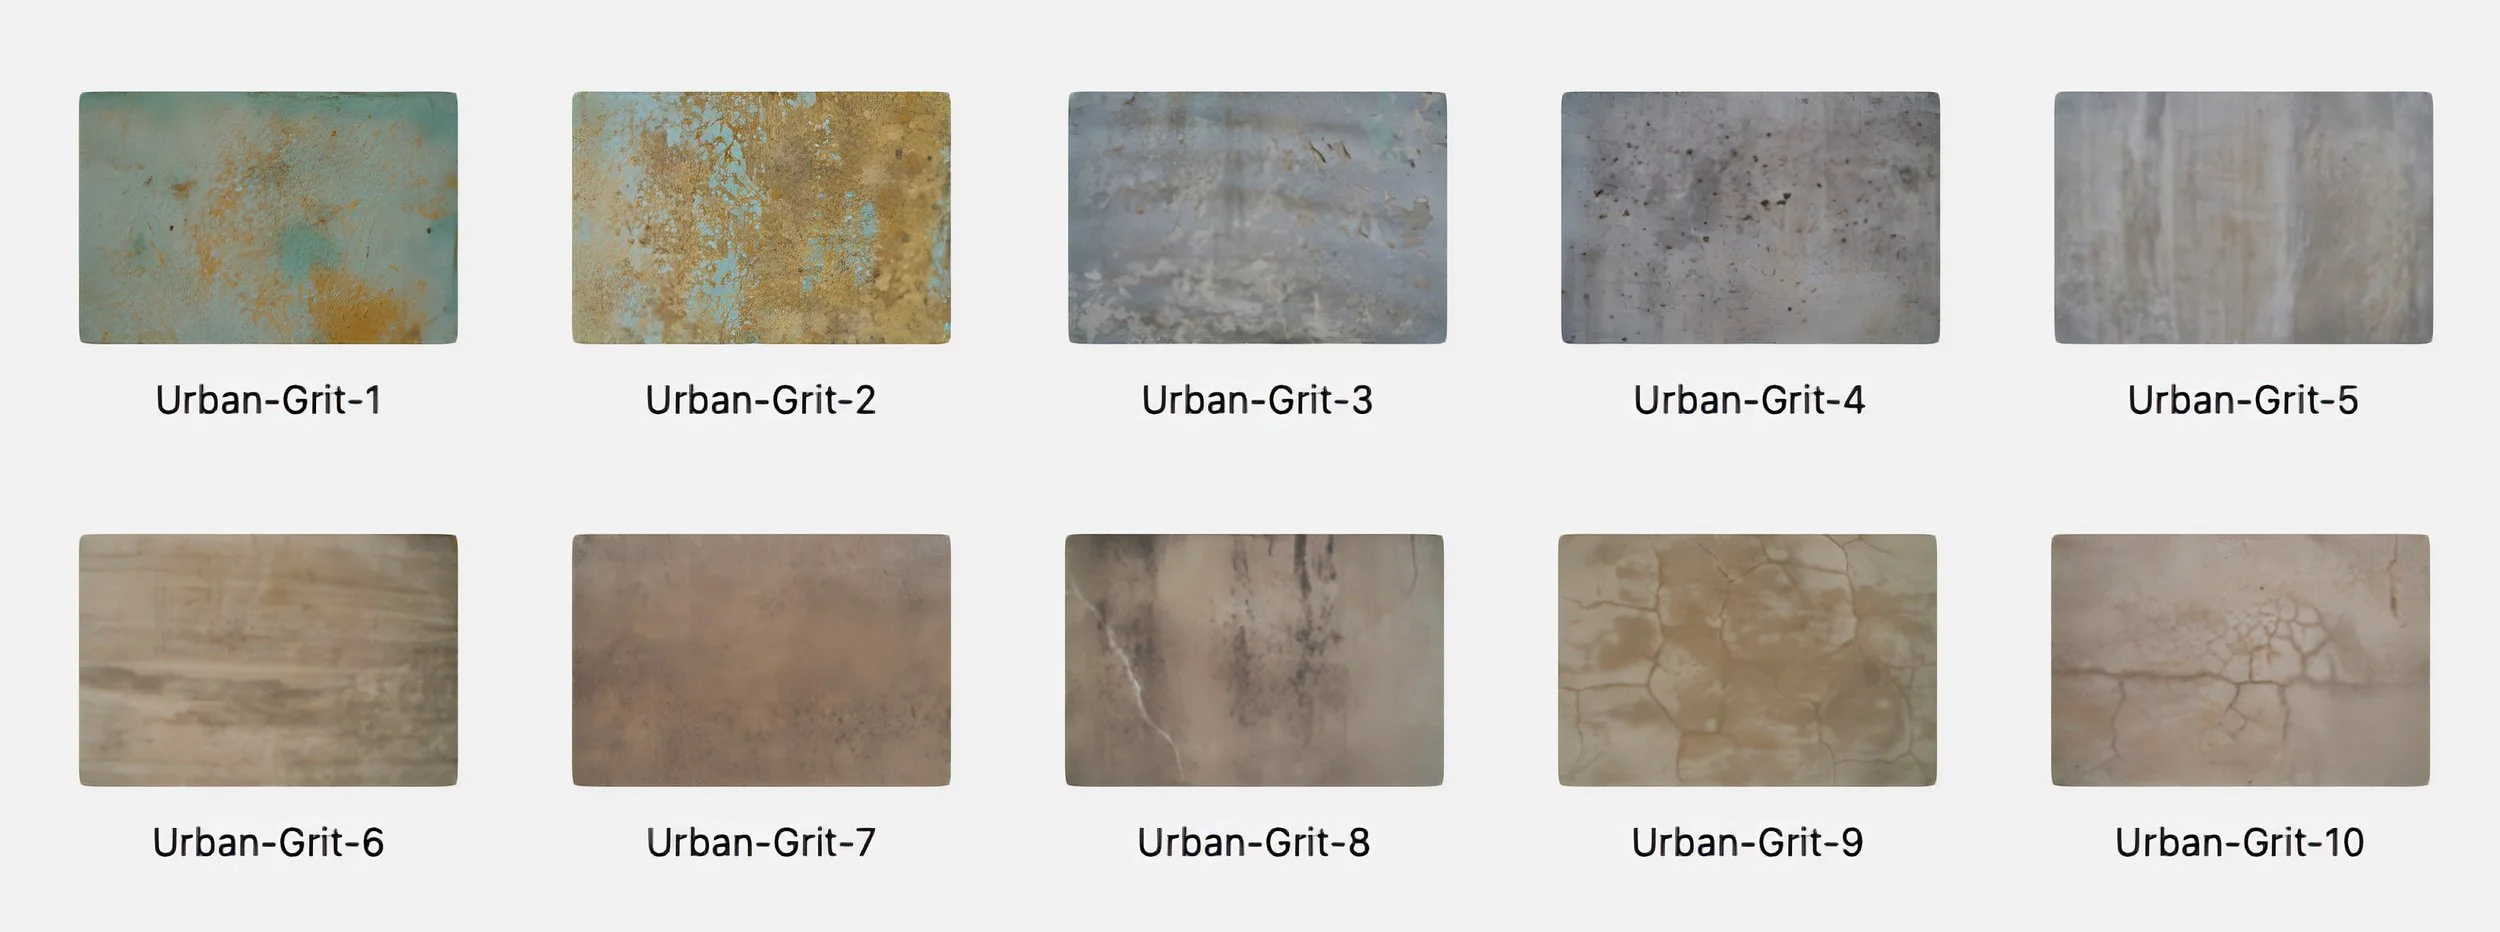
Here’s a bigger view of the texture pack. You can see how interesting these textures are. Imagine the creative possibilities!
These textures are delivered as a digital download in a single ZIP file, which is about 265MB in size. Double click to open it once it is downloaded.